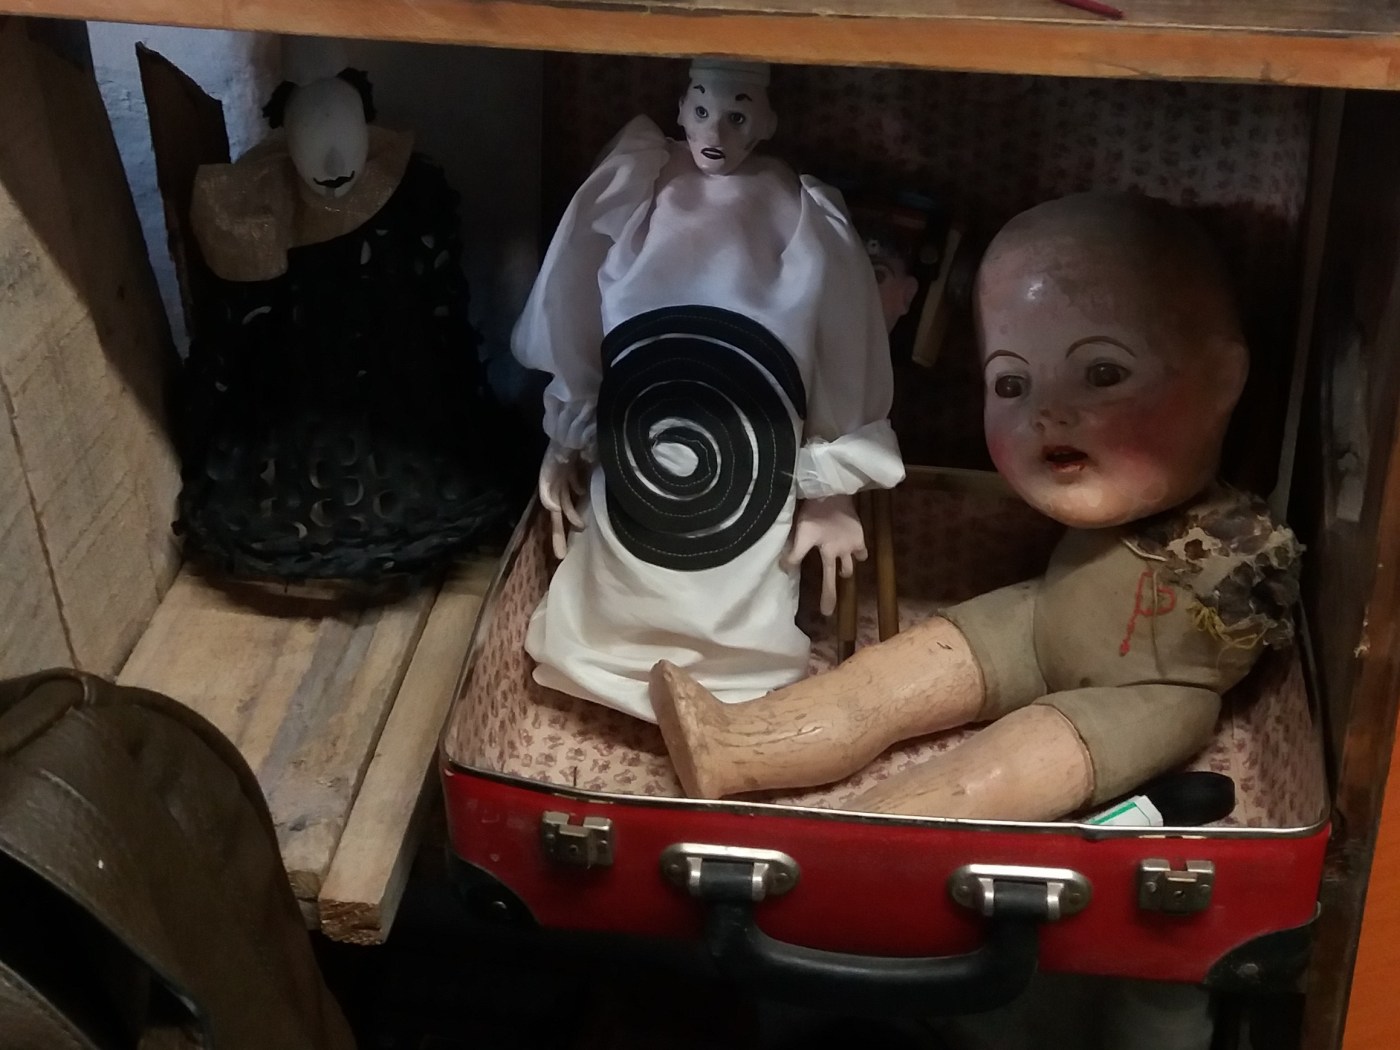
I have been working on a solo project for about a year now, one of the things I love about working on my own a lot is I get full creative rein on what I do, the hardships about flying solo so much however is exactly that… I’m flying solo. Motivation myself to get out there can be a real drag and this new solo project is starting to become quite daunting. I needed someone or something to share the weight. ‘Someone’ was not coming along quite how I’d imagined so I challenged myself to look deeper. The answer came in the form of a puppet.
I found a puppet group in Santiago and asked when they would be running a workshop next. Months went by and it sort of slipped out of my mind until I received an email advising of the up and coming workshops, a Marionettes one was about to start. It was to be a 5 session workshop of 8 hours each with an intimate group of students and two professors, I committed myself to take part. It was then that it occurred to me that I wanted to make a smaller version of myself complete with mini hula hoop.
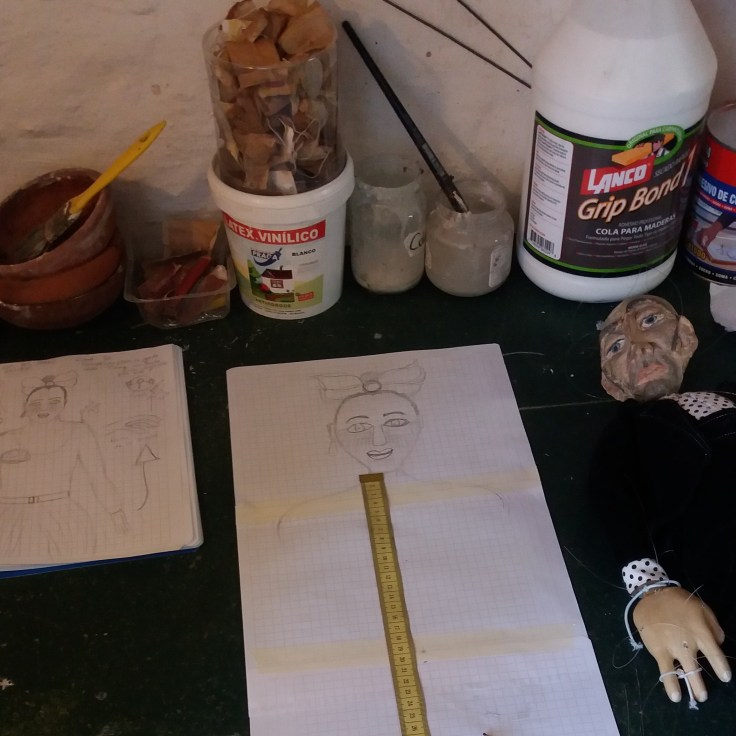
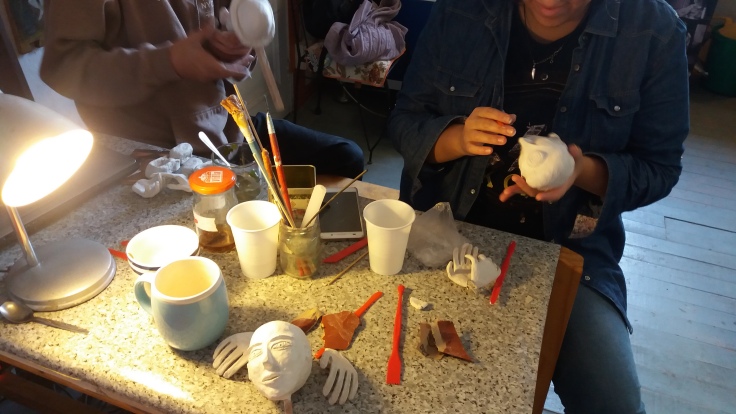
At the first session after getting to know the group and doing a visualisation exercise to get clarity on the type of puppet we wanted to make we got to work straight away on the design and the first hands on step… making the head.
You make the head first out of papier mache and then follow on with the hands and feet. These need to be heavier than the rest of the puppet that will be made out of wood and stuffing as these parts guide the movements so need the weight. Whilst moulding the grey mass onto a polystyrene ball I slipped into the silence, starting off looking like one of the old hecklers off The Muppets, I lost myself as I gently pushed and pulled the papier mache until something alike to my own features started to emerge.
![20180414_162331[1]](https://i0.wp.com/seekingcircus.com/wp-content/uploads/2018/05/20180414_1623311.jpg?w=242&h=429&ssl=1 "20180414_162331[1]")
![20180414_165321[1]](https://i0.wp.com/seekingcircus.com/wp-content/uploads/2018/05/20180414_1653211.jpg?w=241&h=429&ssl=1 "20180414_165321[1]")
![20180414_173301[1]](https://i0.wp.com/seekingcircus.com/wp-content/uploads/2018/05/20180414_1733011.jpg?w=241&h=429&ssl=1 "20180414_173301[1]")
The whole 8 hours dissolved and we left the half finished heads until the next week, promised that they would not dry out and be wet enough to work again. I was not alone in finding it difficult to tear myself away from this engrossing work in progress.
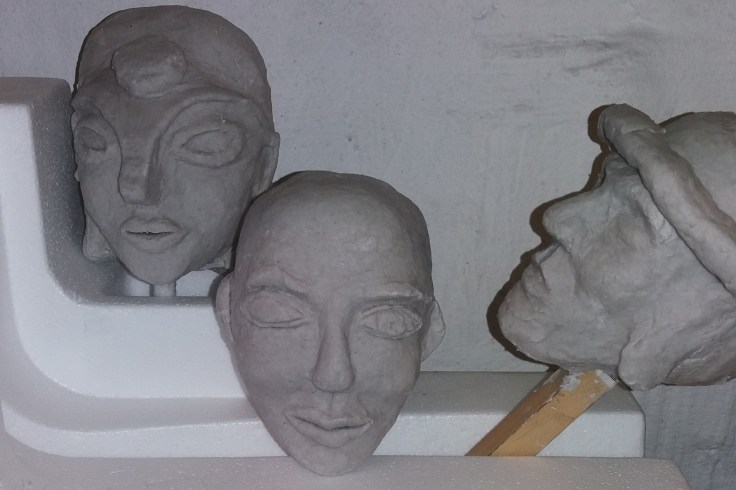
The following week we continued with the head, I made two very perfect ears and was very impressed with my work until one of my colleagues pointed out that one ear was considerably far around the back of the head. Removing it skilfully proved quite a task and it took me ages to get my ears back into the right place and looking somewhat similar. Next onto the hands, made out of wire first and then padded out with papier mache. I was extremely exhausted this particular day and kept making the fingers really fat. I decided to take the rest home with me and finish them there in small relaxing bursts until I was quite pleased with the end result.
![20180425_230532[1]](https://i0.wp.com/seekingcircus.com/wp-content/uploads/2018/05/20180425_2305321-e1525457671879.jpg?w=416&h=555&ssl=1 "20180425_230532[1]")
![20180425_223106[1]](https://i0.wp.com/seekingcircus.com/wp-content/uploads/2018/05/20180425_2231061.jpg?w=312&h=555&ssl=1 "20180425_223106[1]")
![20180425_230532[1]](https://i0.wp.com/seekingcircus.com/wp-content/uploads/2018/05/20180425_2305321-e1525457671879.jpg?w=290&h=386&ssl=1 "20180425_230532[1]")
![20180425_223106[1]](https://i0.wp.com/seekingcircus.com/wp-content/uploads/2018/05/20180425_2231061.jpg?w=217&h=386&ssl=1 "20180425_223106[1]")
![20180421_143113[1]](https://i0.wp.com/seekingcircus.com/wp-content/uploads/2018/05/20180421_1431131.jpg?w=217&h=386&ssl=1 "20180421_143113[1]")
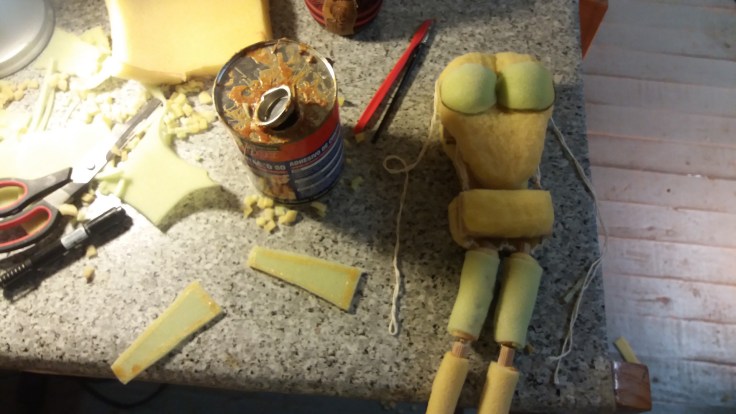
By the third session it was time to move onto the body, two cuts of wood are joined in the middle by string to make the chest and hips. The legs made of dowling cut to measurement and the knee joint filed. Then sponge cut delicately snip by snip to make the curves and features. As we each are on our own process with our marionettes, each one completely different and unique (Moises is creating an clown and Naty an archangel from a tarot deck).
By the 4th session the now dried heads and hands had shrunken a bit from their original size. To finish the head and hands first we had to smooth them off with sand paper before we applied a whitish grey paste called ‘Pasta Das’. It started to set pretty quick so one had to work with small sections of it at a time, first with the hands and then with tools if necessary, to completely cover the rough texture of the dried paper mache. I was having a bit of a fight with the material, I kept plastering on too much so that when I went to work it would stick to my thumb print and tear off. Frustrating to say the least, especially the hands, getting in between those small spaces of the fingers.
The 5th session came along and we were behind schedule. Luckily Pame and Seba were such passionate and dedicated artists that knew their work well, we were not made to rush and they added two extra sessions on for free. I still had to make my shoes and it was time to finish and paint the head and hands. I had a nightmare trying to make the right colour for my skin, to make caucasian skin colour the base is white with two blobs of yellow, two blobs of red and one small dot of blue mixed together to get a peachy complexion. For darker skin tones adding in coffee colour and black with less white. I painted the whole head a peachy colour but it was too white and cold, so I messed around with the palette again until I had a pinker shade which was similar to mine. There was also shading to be done to create the tones, lighter on the forehead for example and darker beneath the nose. It was fun looking in the mirror to see where the shadows cast on my face. I tend to think of myself as one colour and even the Marionettes and Puppets dotted around the class appeared so too until Pame showed us up close examples of how to create the shadows on the face to create more depth and life in the character and I could see the tonal work she had put in. After I’d finished I enjoyed the most painting the eyes, again looking in the mirror and adding touches and hues until I’d got them right.
![IMG-20180522-WA0020[1]](https://seekingcircus.com/wp-content/uploads/2018/06/img-20180522-wa00201-e1530300627273.jpg?w=217&h=300)
6th Session it was time to head to the cutting table. Marking out the patterns for how we would dress our Marionettes. I wanted mine to have clothes that you could take off so she could have costume changes along with my own so extra seams for Velcro and such had to be considered. I wanted her first outfit however to be a copy of one of my own which is a black unitard, a silver flowy open skirt, red rose and my iconic red and gold shoes. All I can say at this point is thank god for youtube and even more so the people who put their precious time into making tutorials. Step by step alongside the youtube tutorial I made first the pattern and eventually the miniature jumpsuit. The shoes had finally dried and I had painted them at home only to discover that they had dried two different sizes! I’m guessing there had been a thicker mass of papier mache in one over the other, I had a go at filing them down bit to even them out but they were still obviously very uneven. I was recommended the pasta das to correct the damage. I had decided to use real hair on my Marionette, the other two guys had made the hair or hat covering the top of the head out of papeir mache so I was the odd one out putting real hair on. I was told to come in in the week to finish the hair off as the following session we would be hanging the puppets on their strings.
![20180526_165948[1]](https://i0.wp.com/seekingcircus.com/wp-content/uploads/2018/06/20180526_16594811.jpg?w=364&h=648&ssl=1 "20180526_165948[1]")
![20180526_144527[1]](https://i0.wp.com/seekingcircus.com/wp-content/uploads/2018/06/20180526_1445271.jpg?w=364&h=648&ssl=1 "20180526_144527[1]")
It turns out trying to find my colour hair, that oh so popular tone known as mousy brown in the UK is almost impossible to find out here without cutting off some of my own hair or spending a fortune on a wig. I found some dolls hair in a craft shop that looked sort of my colour and decided to go with that but it was sold in a tightly curled roll so would be needed to straitened out. I got to the workshop and when we got it out of the packet turns out it was ginger! Pame started showing me how we were going to put it on and I just looked at it and knew it wouldn’t do. I told her I wasn’t happy and she advised me to look into maybe wool or embroidery threads. I went out on a mad mission, this was to be our last week and I was still way behind, I found a fancy dress shop that had wigs in it and saw a wig with dark hair, the deep almost black chestnut brown hair going cheap. Feeling the squeeze of time I bought that and went back. She started showing me the process, the hair was quite fiddly so we glued a black ribbon on the back. She showed me the basic of the technique and then sent me on my way to do the rest at home. When I got home I had a look at it and still wasn’t convinced. I had some packets of unopened ginger hair to return so headed back into town, I was about to buy more hair when I saw an embroidery thread a very decent looking mousy brown. I tossed a coin on whether to stick with synthetic hair or go with the thread as I had been advised. The coin told me threads so I bought 24 packets of it. That week I was a madwoman in the house at night trying to finish. I tore off half the head of my puppet trying to get the old hair off and the process of sewing together the hair pieces to put on the head one layer at a time was a long task. On top of that finishing off the unitard was a nightmare.
![20180601_223622[1]](https://i0.wp.com/seekingcircus.com/wp-content/uploads/2018/06/20180601_2236221.jpg?w=241&h=241&crop=1&ssl=1 "20180601_223622[1]")
![20180601_223420[1]](https://i0.wp.com/seekingcircus.com/wp-content/uploads/2018/06/20180601_2234201.jpg?w=241&h=241&crop=1&ssl=1 "20180601_223420[1]")
![20180604_211210[1]](https://i0.wp.com/seekingcircus.com/wp-content/uploads/2018/06/20180604_2112101.jpg?w=241&h=241&crop=1&ssl=1 "20180604_211210[1]")
The most beautiful part apart from that first sculpting of the head was definitely painting my make-up. The make-up which is personal to me, that I have painted on my own face so many times before preparing to perform, was a gentle joy to paint on her face and her tiny nails. I found some fashion eyelashes in the market that were perfect for her. She was step by step coming to life at last, as I worked so closely on her details she felt full, exploding, like she had so much to say.
![20180601_223432[1]](https://i0.wp.com/seekingcircus.com/wp-content/uploads/2018/06/20180601_2234321-e1530301348607.jpg?w=530&h=353&ssl=1 "20180601_223432[1]")
![IMG-20180528-WA0007[1]](https://i0.wp.com/seekingcircus.com/wp-content/uploads/2018/06/img-20180528-wa00071.jpeg?w=198&h=353&ssl=1 "IMG-20180528-WA0007[1]")
Session 7: The last session was a bit of a rush as I could only participate for half of the day. We made the crucifix and added the small nails and pin heads in the right places to hang the fish wires. It was a bit brutal piercing Wonkitas nose dead centre and her hands too but they were the key places to hang the strings in order to manipulate the puppet and give her the life like movements. Good old sods law turned up right on cue as everything seemed to go wrong in the last session. I already turned up with my puppet missing half of her hair still and it turned out whilst drilling the ankle joints from shoe to leg that the left knee had been getting weaker and weaker over time until the joint broke clean off. I also realised that due to this gentle twisting of the knee joint that I’d not only drilled at a very bad angle the left shoe, I drilled it with the foot sticking right out at an impossible angle. Seba to the rescue this time, he made a mixture of fine sawdust and PVA glue that reinforced the joint. Already feeling the pinch of the last day, I was yet again allowed to come in in the week to do the finishing touches and practice her walk.
![20180602_142208[1]](https://i0.wp.com/seekingcircus.com/wp-content/uploads/2018/06/20180602_1422081.jpg?w=242&h=429&ssl=1 "20180602_142208[1]")
![20180602_122135[1]](https://i0.wp.com/seekingcircus.com/wp-content/uploads/2018/06/20180602_1221351.jpg?w=241&h=429&ssl=1 "20180602_122135[1]")
![20180602_122042[1]](https://i0.wp.com/seekingcircus.com/wp-content/uploads/2018/06/20180602_1220421.jpg?w=241&h=429&ssl=1 "20180602_122042[1]")
At home in between I was able to finish off the final touches, her rose, her hair, the shoes. So when it came time to hang her up it was quite emotional. Practising her walk and movements in front of a mirror were fun. I have been practising at home with her and her hands hold the mini hula hoop I have for her perfectly! The process has been incredible. I am extremely grateful to Seba, Pame and the guys who I shared those intense weeks with, producing an artistic extension of ourselves. I learned that I am actually a bit of a perfectionist when it counts and I can sit still and concentrate enough to loose myself inside of a task in deep focus. There are of course things I have learned during the crafting process that I would do differently the next time and it took a lot to reach moments when I knew I was getting way to knit picky and it was time to just get on with it. I realise that I still have this ridiculous habit of being so tough on myself in my learning process. But I am getting better at reminding myself now that I am learning, and learning is about listening, repeating, trying and making mistakes. Learning is about deciding when to stop for the greater good of the project so that it can actually be finished! Escena Cuantica is the artist collective of Pame and Seba, you can click on their names earlier on in this paragraph to see their Instagram or here for their Facebook page to see more of their work and what these wonderful artists do.
![20180608_132835[1]](https://seekingcircus.com/wp-content/uploads/2018/06/20180608_1328351.jpg?w=576&h=1024)
So now I have my Wonkita, and working on her has allowed me to take a step outside of the my mind and inside of an element of the much larger project that she is part of. It is funny watching myself as I learn through these creative processes I go through and what I need to advance and to create. The cogs have started up again on other aspects of the project so I can actually see an end in sight! I want to end the post with the process of her face as that has been the most defining and enjoyable wave of the project. I hope you have enjoyed this detailed report on my first experience of Marionette making. Please feel free to leave a comment or share it if you find it interesting.
![20180629_145745[1]](https://seekingcircus.com/wp-content/uploads/2018/06/20180629_1457451.jpg?w=736)
If you enjoyed this post or any other part of seekingcircus.com and wish to contribute to the hard work that goes into it then the link below will take you to a place where you can contribute £2.


Leave a comment